
Garage door sensors are a critical safety feature that keeps the door from closing on people, pets, and objects, and when they stop working, the entire door stops responding. A sensor that is dirty, misaligned, or losing power is one of the most common reasons a garage door won’t open, even when the opener runs normally.
Resetting the sensors is often the first step in any garage door repair process, and understanding how to do it correctly can prevent the problem from coming back. This guide covers the root causes of sensor failure, a full step-by-step reset process, and clear guidance on when the problem needs professional attention.
Why Knowing How to Reset Garage Door Sensors Matters

Sensor failure is one of the most common reasons a garage door won’t open, and most homeowners spend time checking the remote control or the opener before they ever think to look at the sensors.
Here is why sensor problems often go unnoticed:
- A simple reset can restore full functionality without a service call.
- Catching a sensor problem early prevents further damage to other components.
- Correctly resetting the sensors keeps the door’s safety feature intact.
- Understanding the process prevents unnecessary garage door repair costs.
- Knowing what to check eliminates the guesswork from the start.
To get a full picture of everything that could be stopping the door from responding, read our guide on Garage Door Won’t Open or Respond? Here’s What’s Going Wrong, which covers every major cause behind a garage door that refuses to move.
Common Reasons Garage Door Sensors Stop Working
Sensor problems rarely appear out of nowhere, and understanding what triggered the issue in the first place makes finding the right fix much easier.
Here are the most common causes worth checking first:
- Accidental bumps knock the sensors out of alignment and break the infrared beam.
- Dust, cobwebs, or small items on the lenses block the signal between the two sensors.
- Frayed wires along the track cut off communication with the motor unit.
- Direct sunlight is a common source of interference for Los Angeles homeowners.
- A tripped circuit breaker cuts power, leaving the sensors unresponsive.
Pinpointing the cause early avoids unnecessary garage door sensor repairs and speeds up the reset process before the door stops working altogether.
Safety Precautions Before Touching Garage Door Sensors
Garage door sensors involve more risk than most people expect, and taking the right precautions before starting protects everyone in the area.
Here are the safety precautions to follow before touching the sensors:
- Unplug the opener or switch off the breaker before handling any part of the system.
- Keep children and pets out of the garage until the reset is complete.
- Clear the path of the door before making any adjustments or running tests.
- Avoid touching the torsion spring or extension springs due to extreme spring tension.
- Stop and call a professional if there are visible broken springs or burning smells.
Skipping any of these precautions can turn a simple sensor reset into a situation that causes injury or further damage.
What to Prepare Before Resetting Garage Door Sensors
Getting the right tools ready before starting saves time and keeps the reset process moving without unnecessary interruptions.
Here is what to prepare before resetting the sensors:
- Dry microfiber cloth for wiping down the sensor lenses.
- Screwdriver for loosening and tightening the sensor mounting brackets.
- Flashlight to inspect wiring and sensor connections in low-light areas.
- A ladder or step stool if the motor unit or terminals are mounted high.
- Level or ruler to confirm that both sensors are at the same height on each side.
Keeping everything within reach before starting reduces the chances of missing a step or leaving the job incomplete.
How to Reset Garage Door Sensors
Step 1 — Power Cycle the System
Unplugging the opener clears minor electronic glitches that stop the sensors from communicating with the garage door motor.
Start with these power cycle steps:
- Locate the power cord on the garage door opener motor and unplug it from the outlet.
- Wait 30 to 60 seconds for the internal memory to fully discharge.
- Plug the motor back in or flip the circuit breaker to the on position.
- Listen for the opener to click or hum to confirm power has been restored.
- Test the door with the remote control before moving forward.
Power cycling is the simplest troubleshooting step and often resolves the issue without any further adjustments.
Step 2 — Clean the Sensor Lenses
Dirty lenses are among the most overlooked causes of a garage door that won’t respond, and cleaning them takes less than a minute.
Run through these cleaning checks:
- Wipe both sensor lenses gently with a dry microfiber cloth.
- Remove dust, cobwebs, or smudges blocking the infrared beam.
- Avoid using water or cleaning sprays directly on the sensors.
- Inspect each lens for cracks or physical damage after cleaning.
- Confirm that both indicator lights respond once the lenses are clean.
Clean lenses restore the infrared beam signal, allowing the sensors to detect obstructions correctly again.
Step 3 — Check for Obstructions
An obstruction anywhere along the sensor path will stop the door from responding, even when everything else in the system is working correctly.
Scan the sensor zone for these common obstructions:
- Tools, trash cans, or boxes are sitting between the two sensors on the floor.
- Small items that rolled into the sensor zone unnoticed.
- Debris or leaves that settled in the path of the infrared beam.
- Anything leaning against the wall near the sensors could break the beam.
Clearing the full path of the door before running any test confirms the sensors have an unobstructed line of sight.
Step 4 — Check and Adjust the Alignment
Misalignment is the most common reason sensors stop working, and adjusting the angle of a single sensor is usually enough to restore the connection.
Work through these alignment checks:
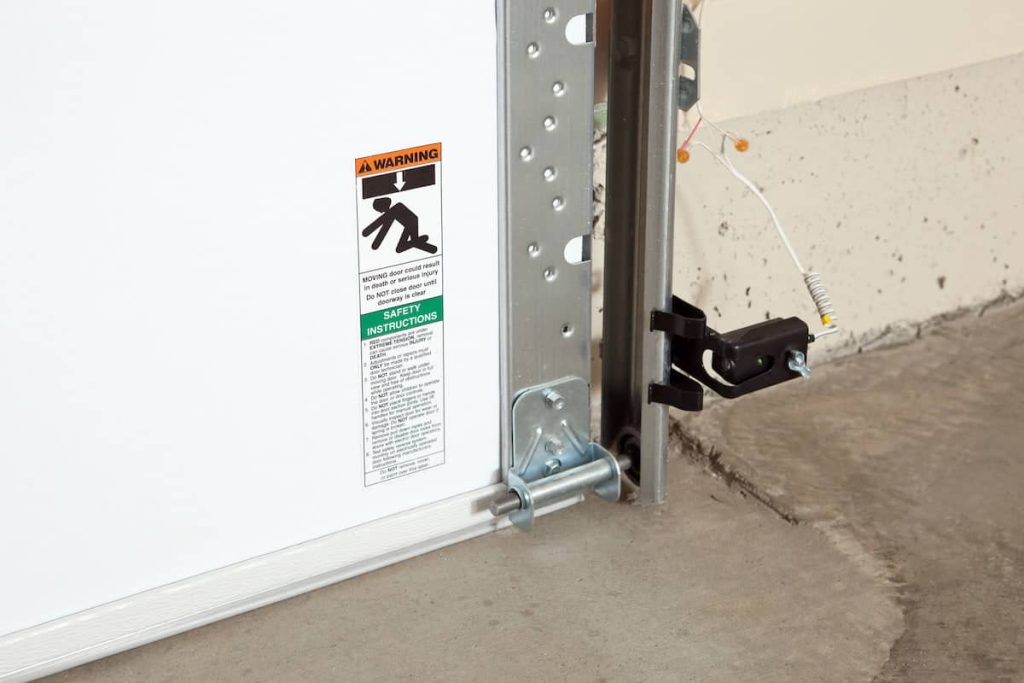
- Locate both sensors mounted a few inches off the ground on the sides of the door.
- Check the indicator lights: the sending sensor shows amber, and the receiving sensor shows green.
- Loosen the wing nut on the bracket of the sensor with the blinking or off light.
- Adjust the sensor angle up, down, left, or right until both lights shine steadily.
- Tighten the wing nut once both lights are solid to lock the sensor in place.
Steady indicator lights on both sensors confirm that the infrared beam has been restored and the door is ready to operate.
Step 5 — Check Wiring Connections
Loose or damaged wiring between the sensors and the motor unit is a common issue that gets missed during basic troubleshooting.
Inspect the wiring by going through these checks:
- Look for pinched or frayed wires running along the track toward the motor unit.
- Check each wire terminal on the opener unit to confirm connections are secure.
- Look for rust, plastic shavings, or visible wear near the wiring path.
- Press any loose wires back into their terminals without forcing them.
- Note any wires that appear burned, chewed, or broken along the full run.
Visible wiring damage beyond a loose connection usually indicates a garage door opener repair that requires a professional garage door technician to handle correctly.
Alternative Troubleshooting Methods After a Sensor Reset
When the sensors check out, but the garage door still won’t open, other parts of the system may be the reason.
Here are the alternative troubleshooting methods worth checking after a sensor reset:
- Check if the manual lock on the inside of the door was accidentally engaged.
- Look for the lock button on the wall console to disable the remote control.
- Inspect the torsion spring above the door for a visible gap or break in the coil.
- Check the extension springs for signs of wear or snapping along the sides of the door.
- Confirm the emergency release cord was not pulled, disconnecting the door from the opener.
To learn how to safely open the door when none of these checks resolve the issue, read our guide on Garage Door Won’t Open? How to Manually Open It Safely, which walks through the process without damaging the system.
Still Not Working? What to Do When Sensor Reset Fails
When every reset step has been completed, and the garage door still won’t open, the problem has likely moved beyond the sensors.
Here are the signs that the sensor reset did not fully resolve the issue:
- Stop operating the door to avoid putting additional strain on already stressed components.
- Document what was checked during the reset process before calling for help.
- Check the opener unit for unusual sounds, heat, or burning smells.
- Call a professional garage door technician to inspect the full system.
- Avoid forcing the door open manually if broken springs or damaged cables are suspected.
To understand what the next step looks like, depending on the condition of the system, read our guide on Garage Door Won’t Open? When to Repair or Replace, which covers everything a homeowner needs to know before making a decision.
When to Call a Professional for Garage Door Sensor Problems
Recognizing when a sensor problem requires professional attention prevents the issue from getting worse and keeps the door operating correctly.
Here are the situations that call for a professional garage door technician:
- Sensor wiring is visibly burned, chewed, or too damaged to reconnect.
- The torsion spring or extension springs show signs of damage or breakage.
- The opener unit produces burning smells, sparks, or unusual heat.
- Repeated alignment attempts fail to produce steady indicator lights.
- The door moves unevenly or struggles to lift even after a completed reset.
Calling a professional ensures a proper inspection, and for urgent situations, emergency garage door repair gets the door back in working order without delay.
Reset Your Garage Door Sensors the Right Way With Professional Help
Garage door sensors are a critical part of every system, and knowing how to reset them correctly makes the difference between a door that works and one that stays stuck. Understanding the root causes, following the right reset process, and knowing when to stop troubleshooting keeps the entire door system running at its best.
First Class Garage Doors brings years of hands-on experience serving homeowners across Los Angeles, from simple sensor resets to full system diagnostics. Contact us or give us a call today, and let our team assess exactly what the system needs to get the door responding again.
Frequently Asked Questions
Can a power outage cause my garage door sensors to stop working?
Yes. A power outage can disrupt the sensor connection, causing the system to stop responding entirely. Performing a power cycle after power is restored usually gets the sensors communicating with the opener again.
Why do my garage door sensors keep losing alignment after being fixed?
Loose mounting brackets are usually the reason sensors keep shifting out of position. Tightening the wing nuts and checking the bracket condition after every reset helps maintain stable alignment over time.
What else could be wrong when my garage door won't open even after the sensors are aligned?
A disengaged trolley, a tripped breaker, or a worn gear inside the opener unit are all common causes worth checking when my garage door won't open despite the sensors being properly aligned. Inspecting these components after confirming sensor alignment helps narrow down the exact cause.
How many times can garage door sensors be reset before they need to be replaced?
Sensors do not have a fixed reset limit, but frequent resets that keep failing indicate the sensors are wearing out. Persistent issues after multiple resets usually mean the sensors or their wiring need to be replaced.
Why my garage door won't open all the way, even after resetting the sensors?
A garage door that won't open all the way after a sensor reset is often connected to the limit settings on the opener unit rather than the sensors themselves. Adjusting the open limit setting on the opener usually resolves this without replacing any components.
Can I reset garage door sensors without a remote or wall switch?
Yes. Sensor reset steps, such as power cycling, cleaning the lenses, and adjusting alignment, can all be performed manually without using a remote or wall switch. The remote control is only needed when testing the door after the reset is complete.
What does it mean when both sensor lights are off after a reset?
Both lights being off after a reset usually point to a wiring issue or a loss of power to the sensor circuit. Checking the wire terminals at the motor unit and confirming the breaker is on are the first steps.
Why does my garage door reverse immediately after I try to close it even though the sensors are reset?
The door reversing immediately after a closing command is a classic sign that the sensors are still not fully aligned or that something is interrupting the infrared beam. Double-checking the sensor angle and clearing the door's full path usually resolves the issue.
Is it possible that the garage door opener itself is causing the sensors to malfunction?
Yes. A failing opener unit can deliver inconsistent power to the sensors, causing them to behave erratically even after a reset. When every sensor check has been completed and the door still does not respond, the opener unit itself may need a professional inspection.